Showing posts with label tutorial. Show all posts

Monday, December 10, 2012

Glidecam HD-2000

  This past month I was given the opportunity to use a Glidecam HD-2000 camera stabilizers to mount my camera and shoot handheld.  I just wanted to explain some tips I learned while using the stabilizer and talk about my experience.

  The Glidecam was suggested to me by one of my friends who owns one because he said it would aid in stabilizing shots and take out natural shakiness of simply shooting handheld.  I took his advice and he allowed me to borrow his Glidecam.  Upon first getting the Glidecam I had to recalibrate the stand for my own camera.  I found that since I only have a zoom lens for my DSLR I needed to extend the lengthen the main rod in order to counter balance the extra weight of my camera(this could also be achieved by adding extra weight to the stabilizers and keeping the stand the same weight, however it would make the rig heavier and more difficult to use).  After that I had to calibrate the rig to perfectly balance my camera so the rig would stay right side up.

  Once I finished calibrating I began to practice.  To properly use a Glidecam you must use two hands.  One hand to hold the handle which holds the majority of the rigs weight, and the other hand to lightly and delicately hold the main rod of the rig and point the camera.  After an extreme amount of practicing I went out to the shoot and used the rig.  I can honestly say that the camera not only increased perceived  the production value of the project, it substantially improved the quality of the work by allowing for fluid movements unattainable using simply a handheld camera.  Although our film encompassed both Glidcam and handheld shots (depending on motivation) I personally enjoyed watching back the shots taken on the Glidecam substantially more.  After using the Glidecam for only a short time I am convinced that this tool may be worth the investment in order to improve the quality of my projects.

Thursday, November 29, 2012

Color correction for the color blind!

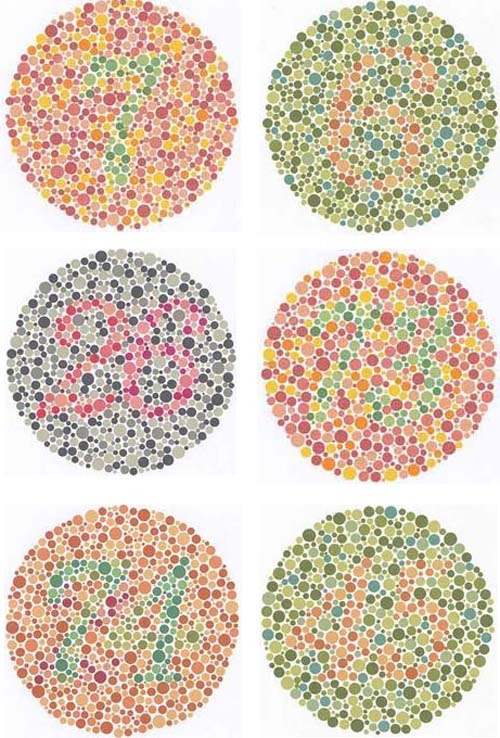
Look at this picture below:

If you were unable to see one or more numbers hidden in the big circles, then congratulations! You are most likely colorblind. The number should be apparent.

If you are colorblind and in denial, this is the size of the numbers that you should be able to see.

So you are color blind, and if you work with photography, including video, this can be a major problem. Why? Well if you know how a camera works, you'd know that there are different light temperatures depending of the source of light that the camera can pick up more than our eye does. This results in different color tints on the picture than you want. And for a colorblind person it can be difficult to tell if the color os off, and how far off it is.

But have no fear! Someone found a way to color correct photos, even for a colorblind person in post-production. Colorblind photographer Chris Nicholson has developed a way to be able to color correct photos for colorblind people. 

It is a little time consuming, but considering how much it can enhance/save a photograph it is completely worth looking at. This especially becomes true when it is used to earn a living. So from one colorblind person to another, thank you Mr. Nicholson, and I recommend everyone to check out this tutorial.